So, you’ve got a 2JZ engine and you’re itching to squeeze every bit of performance out of it. But here’s the catch—the stock ECU just won’t cut it anymore. It’s like trying to paint a masterpiece with a blunt brush. That’s where a standalone ECU steps in. It gives you the freedom to tune your engine exactly how you want, no limits, no compromises. Imagine having the power to tweak boost levels, fuel maps, and ignition timing with precision—like having a custom-tailored suit instead of off-the-rack clothes.
Installing a standalone ECU isn’t just about swapping hardware; it’s about unlocking a new level of control. You can adapt to modifications, whether it’s a bigger turbo, upgraded injectors, or a custom exhaust. The stock ECU is designed to work within factory specs, but your build? It’s unique. This upgrade lets you speak the engine’s language fluently, ensuring every component works in harmony.
Now, the process might seem daunting at first. Wiring, sensors, maps—it’s a lot to take in. But take a breath. It’s a journey worth embarking on. With the right guidance, you’ll find that installing a standalone ECU is like assembling a puzzle where every piece fits perfectly, resulting in a machine that responds instantly to your commands. And the best part? You get to learn your engine’s quirks and strengths firsthand.
Think of this guide as your roadmap. We’ll walk through the why, the what, and the how of standalone ECUs for the 2JZ. From choosing the right unit to wiring it up and dialing in your tune, you’ll gain insights that turn tech talk into practical steps. By the end, you’ll not only have a powerful setup but also the confidence to tweak and tune like a pro, making your 2JZ roar exactly how you want it.
Why Go Standalone? Benefits Over the Stock ECU
Ever felt like your 2JZ engine is holding back? Like it’s got so much more potential, but the stock ECU just can’t keep up? That’s exactly where a standalone ECU steps in. It’s not just an upgrade; it’s a whole new level of control and freedom. The stock ECU is designed to work for the average driver, balancing fuel economy, emissions, and safety. But when you start pushing your engine with modifications—turbo upgrades, bigger injectors, or custom cams—the factory brain starts to struggle. It’s like trying to fit a square peg in a round hole.
With a standalone ECU, you get a blank canvas. You’re no longer tied to the factory limits. This means you can fine-tune every aspect of your engine’s performance. Want to tweak the fuel maps for better throttle response? Done. Need precise boost control to avoid knocking? Easy. The standalone ECU gives you the power to dial in your setup until it sings exactly how you want it.
Another huge benefit is reliability. Stock ECUs can be sensitive to modifications and often throw error codes or go into limp mode when things get out of their comfort zone. A standalone ECU, on the other hand, is built to handle aggressive tuning and advanced setups without breaking a sweat. It’s like swapping out a basic toolkit for a professional-grade one—everything just works smoother.
And don’t forget about future-proofing. If you plan to keep upgrading your 2JZ, a standalone ECU can grow with you. It supports a wide range of sensors and inputs, so adding things like wideband O2 sensors, boost controllers, or even digital dashboards becomes straightforward. You’re not stuck with the limitations of the stock system.
In short, going standalone means freedom, precision, and peace of mind. It’s not just about making more power—it’s about making your 2JZ work for you in a way the stock ECU never could. Think of it as giving your engine a smarter, more flexible brain that’s ready to handle whatever you throw at it.
Top Standalone ECUs for 2JZ Builds: Link, Haltech, ECUMaster, AEM
When it comes to tuning your 2JZ engine, picking the right standalone ECU can feel like choosing the perfect tool for a delicate job. Each brand offers something a little different, and understanding those nuances can save you headaches down the road. Let’s break down the top contenders: Link, Haltech, ECUMaster, and AEM.
Link ECUs are often praised for their user-friendly interface and solid reliability. If you’re new to standalone setups, Link can be a great starting point. Their software is intuitive, making it easier to tweak your engine’s parameters without getting lost in endless menus. Plus, they support a wide range of sensors and setups, which means you won’t feel limited as you modify your 2JZ.
Haltech</strong stands out for its advanced features and flexibility. It’s like the Swiss Army knife of ECUs. Whether you’re running a naturally aspirated 2JZ-GE or a turbocharged GTE, Haltech’s systems allow fine-tuned control over everything from ignition timing to boost management. The learning curve is a bit steeper, but if you want to push your build further, it rewards that effort with precision and performance.
ECUMaster</strong offers a perfect balance between affordability and functionality. It’s especially popular among DIY tuners who want solid results without breaking the bank. The interface is straightforward, and their support community is active, which means you’ll find plenty of tips and tricks online. For many, ECUMaster hits the sweet spot of ease and capability.
Then there’s AEM</strong, a brand synonymous with motorsports. Their standalone ECUs are robust and packed with features designed for serious performance builds. If you’re aiming for a race-ready 2JZ, AEM’s systems provide advanced data logging and tuning options that let you dial in every last bit of power and efficiency. The price tag is higher, but for those who demand the best, it’s worth every penny.
| Brand | Best For | Key Strengths | Ease of Use | Price Range |
|---|---|---|---|---|
| Link | Beginners & Intermediate | User-friendly software, wide sensor support | High | Moderate |
| Haltech | Advanced Tuners & Performance Builds | Highly customizable, excellent boost control | Medium | Moderate to High |
| ECUMaster | DIY Tuners & Budget Builds | Affordable, solid functionality | High | Low to Moderate |
| AEM | Race & High-Performance Builds | Advanced data logging, motorsports-grade | Medium | High |
Choosing the right ECU isn’t just about features or price—it’s about how well it fits your goals and your comfort level with tuning. Think of it like picking a pair of shoes for a marathon: you want something that fits just right and can handle the long haul. Whether you’re chasing daily driveability, weekend track fun, or full-blown race performance, these four brands cover a wide spectrum of needs and budgets.
Plug-and-Play vs Custom Wiring Harness: What You Need
When it comes to wiring your standalone ECU on a 2JZ, the choice between a plug-and-play harness and a custom wiring harness can feel like standing at a fork in the road without a map. Both paths lead to the same destination—getting your engine wired up and ready to roar—but the journey looks very different depending on your choice.
A plug-and-play harness is like a ready-made puzzle piece designed to fit perfectly with your 2JZ engine’s factory connectors. It’s a lifesaver if you want to skip the headache of cutting wires, matching colors, and troubleshooting connection errors. Imagine buying a pre-assembled LEGO set where every piece snaps together without forcing it. The biggest perk? It saves time and reduces the risk of wiring mistakes, especially if you’re not an electrical wizard. However, this convenience comes at a price—you might find these harnesses a bit restrictive if your build includes unusual sensors or extra modifications that the stock setup doesn’t cover.
On the flip side, a custom wiring harness is like tailoring a suit to fit your exact measurements. It’s crafted from scratch to match every sensor, actuator, and control device you plan to use. This option gives you the ultimate freedom, letting you add or remove components as you see fit. But beware: it demands patience, attention to detail, and a solid understanding of automotive wiring principles. One wrong connection can turn your engine bay into a confusing spaghetti mess or, worse, cause electrical gremlins that are tough to hunt down.
So, how do you decide which harness suits your project? Consider these points:
- Experience level: If you’re new to ECU wiring, plug-and-play is a safer bet.
- Build complexity: Custom harnesses shine when your setup includes aftermarket sensors or unique mods.
- Budget and time: Plug-and-play saves time but can be pricier; custom wiring might cost less but requires more hours.
In my own build, I went with a plug-and-play harness first. It let me get the engine running quickly and gave me a solid base to learn from. Later, as I added more sensors and controls, I switched to a custom harness to keep everything neat and perfectly matched. This two-step approach might be the best of both worlds if you’re unsure where to start.
Ultimately, the wiring harness is the nervous system of your ECU setup. Whether you choose plug-and-play or custom, the goal is the same: clean, reliable connections that let your 2JZ breathe and perform at its best. Don’t rush it—take your time, double-check your work, and enjoy the process of making your engine truly yours.
How to Wire a Standalone ECU to a 2JZ-GTE or GE
Wiring a standalone ECU to your 2JZ engine might sound like a daunting task, but it’s a lot more straightforward than you think—if you take it step by step. Whether you’re working on the turbocharged 2JZ-GTE or the naturally aspirated 2JZ-GE, the basics remain the same, though a few nuances set them apart. The key is patience and understanding what each wire does before you connect it.
First off, you’ll want to get familiar with the factory wiring harness. It’s like the engine’s nervous system—every sensor, injector, and ignition coil has a wire leading back to the stock ECU. When you switch to a standalone unit, you’re essentially rerouting those signals to a new brain. This means you need to carefully identify and label each wire. Trust me, this step saves tons of headaches later on.
For the 2JZ-GTE, pay close attention to the turbo-related sensors like the boost pressure sensor and the additional injectors if you’re running a parallel setup. The 2JZ-GE is simpler but don’t let that fool you—accurate wiring of the cam and crank sensors is crucial for proper timing and engine function. A missed wire here can cause your engine to misfire or not start at all.
Here’s a quick rundown of the essential wiring connections you’ll need to tackle:
- Power and Ground: The ECU needs clean, stable power and a solid ground. Don’t skimp on this—bad grounding can cause erratic sensor readings.
- Injectors and Ignition Coils: These are your engine’s fuel and spark delivery systems. Make sure each injector and coil wire matches the ECU’s output channels.
- Crank and Cam Position Sensors: These tell the ECU when to fire injectors and spark plugs. Incorrect wiring here means no start or poor running.
- Sensors like TPS, IAT, and MAP: These feed vital information about throttle position, air temperature, and manifold pressure.
One trick I learned the hard way is to use a multimeter to verify continuity and voltage on each wire before plugging in the ECU. It’s like double-checking your homework—catching errors early saves a lot of frustration. Also, don’t forget to protect your wiring with proper insulation and secure routing to avoid chafing or heat damage.
Finally, remember that every standalone ECU brand has its own wiring diagram and pinouts. Always cross-reference your engine’s wiring with the ECU’s manual. Sometimes, a wire that’s “pin 5” on one harness might be “pin 7” on another. Getting this right is the difference between a smooth startup and hours of troubleshooting.
Wiring your standalone ECU is a hands-on puzzle. But once all pieces click, you’ll experience a whole new level of control over your 2JZ’s performance. It’s worth every minute spent under the hood.
Sensor Integration: MAP, IAT, Wideband, and More
When it comes to installing a standalone ECU on your 2JZ, sensor integration isn’t just a step—it’s the heartbeat of your engine’s performance. Think of sensors as your car’s senses, constantly feeding vital information to the ECU so it can make split-second decisions. Without accurate data from sensors like the MAP (Manifold Absolute Pressure), IAT (Intake Air Temperature), and wideband O2, your tuning journey is like trying to navigate in the dark. You simply won’t get the precision you need.
Take the MAP sensor, for example. It measures the pressure inside the intake manifold, which directly relates to how much air your engine is breathing. If this sensor isn’t wired or calibrated correctly, your ECU can’t accurately calculate fuel delivery or boost levels. That’s like trying to cook without knowing how hot your stove is—disaster waiting to happen. Similarly, the IAT sensor tells the ECU how warm or cold the incoming air is. Since air density changes with temperature, this data is crucial for adjusting fuel and ignition timing. Imagine trying to hit a target blindfolded; that’s what tuning without proper IAT input feels like.
Then there’s the wideband O2 sensor, arguably one of the most important pieces for any tuner. Unlike the narrowband sensors stock ECUs use, widebands provide a detailed look at your air-fuel ratio (AFR) across the operating range. This means you can keep your 2JZ running lean enough for power but rich enough to avoid damage. It’s like having a real-time health monitor for your engine. Installing the wideband sensor correctly ensures that your ECU gets accurate feedback to adjust fueling on the fly, which is especially critical under boost or heavy load.
But sensor integration goes beyond just hooking up wires. You have to consider sensor placement, wiring quality, and ECU input configuration. For instance, placing the IAT sensor in the right spot—ideally after the intercooler but before the throttle body—makes a huge difference in accuracy. Poor placement can lead to lagging or false readings, making your tune unstable. And don’t overlook the wiring! Using shielded cables and proper grounding reduces electrical noise that can confuse your ECU.
Here’s a quick rundown of essential sensors and their roles:
- MAP Sensor: Measures boost and vacuum pressure.
- IAT Sensor: Tracks intake air temperature for fuel adjustments.
- Wideband O2 Sensor: Monitors real-time air-fuel ratio.
- Throttle Position Sensor (TPS): Helps manage throttle response and fueling.
- Coolant Temperature Sensor: Ensures proper engine temperature readings for timing and fuel.
Integrating these sensors properly transforms your standalone ECU from a simple controller into a smart brain that reacts and adapts. It’s the difference between a rough guess and a finely tuned symphony. So, take your time wiring and calibrating each sensor. Your 2JZ will thank you with smoother power delivery, better reliability, and a driving experience that feels truly dialed in.
ECU Setup: Base Maps, Startup, and Idle Control
Setting up your standalone ECU is like laying the foundation of a house — if it’s shaky, everything built on top will suffer. The base map is your starting point, the default tune that gets your 2JZ engine running smoothly before you dive into fine-tuning. Think of it as the engine’s “comfort zone.” Without a solid base map, you’re basically driving blind, hoping the engine behaves as expected. It’s crucial to get this right because it influences every other adjustment you’ll make.
Next up is the startup routine. Ever tried starting a car on a cold morning, only to have it stall or hesitate? That’s what a poorly configured startup map feels like. The ECU needs to know exactly how to handle fuel injection and ignition when the engine is cold, warm, or anywhere in between. Setting this up properly means your 2JZ will fire up quickly and run without hiccups, no matter the weather or conditions. It’s like having a friend who knows just how to warm you up on chilly days.
Then comes the often overlooked but absolutely vital idle control. Idle isn’t just about keeping the engine running when you’re stopped; it’s about stability and responsiveness. A well-tuned idle control keeps the engine from stalling, prevents rough idling, and sets the stage for smooth acceleration. Imagine trying to hold a tune without missing a beat — that’s what your idle control does for your engine’s rhythm. Fine-tuning this means adjusting parameters like idle speed, throttle position, and fuel delivery to keep everything balanced.
Getting these settings right can feel overwhelming, but here’s a simple way to think about it: base maps set the stage, startup routines get the show going, and idle control keeps the performance steady. If one part falters, the whole act suffers. For beginners, starting with manufacturer-provided base maps is a smart move. These are designed to be safe and reliable, giving you a solid platform to tweak from.
Remember, tuning isn’t a one-and-done deal. It’s a process of trial, error, and adjustment. Sometimes you’ll need to tweak the base map after logging data from a test drive. Other times, startup parameters might need a nudge to handle a new sensor or modification. Idle control often requires patience, as small changes can have big effects.
In short, don’t rush through ECU setup. Take your time. Think of it like tuning a musical instrument — the better you set it up, the sweeter the sound. With the right base maps, startup settings, and idle control, your 2JZ will run like a dream, ready to unleash its full potential on the road or track.
Using a CAN Keypad or Digital Dash with Your ECU
Imagine having full control and instant feedback from your 2JZ engine right at your fingertips. That’s exactly what a CAN keypad or digital dash offers when paired with your standalone ECU. Instead of fumbling through menus on a laptop or guessing what’s going on under the hood, you get a clear, real-time snapshot of your engine’s vital stats. It’s like having a co-pilot who never misses a beat.
Now, you might wonder, why bother adding these gadgets? Well, think of it this way: your ECU is the brain, but the keypad or dash is the eyes and hands. They let you tweak settings on the fly, monitor boost levels, air-fuel ratios, and ignition timing without needing to stop and plug in a computer. This can be a game-changer during track days or tuning sessions where every second counts.
Setting up a CAN keypad or digital dash usually involves tapping into the ECU’s CAN bus system—a communication highway that lets devices “talk” to each other seamlessly. Once connected, you can customize what data shows up on your display. Want to keep an eye on your boost pressure or knock sensor readings? No problem. Prefer a minimalist setup with just RPM and coolant temp? Easy.
One thing to keep in mind is compatibility. Not all ECUs support every keypad or dash out there. Before buying, double-check if your standalone ECU plays nice with the display you want. Also, wiring can get a bit tricky if you’re not familiar with CAN protocols. But don’t worry—most manufacturers provide clear wiring diagrams and setup guides to get you started.
In practical terms, imagine you’re mid-run on the strip. Your digital dash flashes a warning about lean conditions or a spike in knock. Instead of guessing or pulling over, you can instantly dial back boost or adjust fueling using the keypad. This kind of hands-on control helps protect your engine and squeeze out every bit of performance.
So, whether you’re a weekend warrior or a seasoned tuner, adding a CAN keypad or digital dash brings your standalone ECU setup to life. It’s not just about data; it’s about making that data work for you in real time. And trust me, once you’ve experienced that level of control and clarity, you’ll wonder how you ever tuned without it.
Tuning Tips: Boost Control, AFR Targets, Ignition Tables
Tuning your 2JZ engine isn’t just about cranking up the power—it’s about balance. Imagine you’re cooking a complex recipe. Too much spice, and the dish’s ruined; too little, and it’s bland. Same with boost control, AFR targets, and ignition timing. Each needs to be dialed in just right to get the most out of your engine without risking damage.
Boost control is your throttle’s best friend. It’s what decides how much extra air you shove into the engine. But here’s the catch: pushing boost too hard without proper control is like trying to sprint before you can walk. Sudden spikes can cause knock or even catastrophic failure. A smooth, progressive boost curve keeps power delivery predictable and safe. Many tuners start with a conservative boost target, then slowly raise it while monitoring engine feedback.
Now, let’s talk AFR targets—air-fuel ratio. This is the heart of combustion efficiency. Running too lean (too much air) can cause engine knocking or overheating, while too rich (too much fuel) wastes power and fouls spark plugs. A good rule of thumb? Aim for around 11.5:1 to 12.5:1 under boost for a 2JZ. This range keeps your engine happy and responsive. But remember, every build is unique. Factors like fuel type, turbo size, and engine health can shift your ideal AFR.
Ignition timing is the final piece of the puzzle. Think of it as the conductor of an orchestra, signaling when the spark plugs should fire. Too advanced, and you risk knock; too retarded, and you lose power and efficiency. A well-tuned ignition table will adjust timing dynamically, based on RPM and load. Start with conservative timing values and use a knock sensor to safely advance timing where possible.
Here’s a quick glance at how these elements interplay:
| Parameter | Effect if Too Aggressive | Effect if Too Conservative |
|---|---|---|
| Boost Control | Engine knock, mechanical stress | Underwhelming power, sluggish response |
| AFR Targets | Overheating, detonation | Poor fuel economy, fouled plugs |
| Ignition Timing | Knock, engine damage | Reduced power, inefficient burn |
When tuning, patience is your best ally. Test small changes, observe results, then adjust. Use tools like wideband O2 sensors and knock detection to guide your decisions. Remember, tuning isn’t a one-time event—it’s a journey. And with each tweak, you get closer to that sweet spot where your 2JZ sings with power and reliability.
How to Avoid Common Wiring and Configuration Mistakes
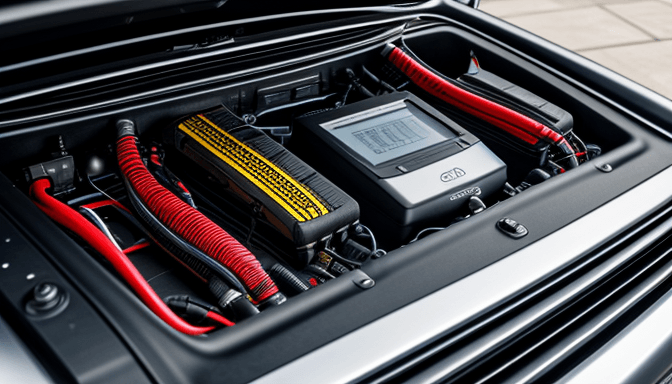
Wiring a standalone ECU to your 2JZ engine might sound like a walk in the park, but trust me, it’s a minefield if you’re not careful. One wrong connection and you could be chasing ghost problems for hours. The trick? Take a breath, plan ahead, and double-check every step. Think of it like building a puzzle—each wire has its place, and forcing a piece in the wrong spot only leads to frustration.
First off, don’t rush the wiring process. It’s tempting to dive right in and get it done, but patience is your best friend here. Label your wires as you go. If you’re working without labels, you’re basically setting yourself up for a headache later. Imagine trying to remember which wire controls the fuel pump or the ignition coil after a few hours of fiddling—yeah, not fun.
Another common pitfall is mixing up sensor signals. The 2JZ relies on precise data from sensors like the crank position, cam position, and MAP sensor. Plugging these sensors into the wrong inputs can cause the ECU to misfire or not start at all. It’s like giving your brain mixed signals—it just won’t work right. Always refer to your ECU’s wiring diagram and cross-check it with the 2JZ’s factory pinouts.
Something else to watch out for is grounding. A poor ground connection is like trying to run a marathon with one shoe untied. It might work for a bit, but eventually, it’ll trip you up. Make sure all grounds are clean, tight, and connected to a solid metal point on the chassis or engine block. Don’t just twist wires together and call it a day.
When it comes to ECU configuration, jumping straight into tuning without setting up a proper base map is a rookie mistake. It’s like trying to drive a car blindfolded. Start with a reliable base map tailored for the 2JZ and your specific ECU model. Then, take it slow—adjust one thing at a time and test thoroughly. This approach saves you from chasing down multiple issues at once.
Finally, don’t forget about backup. Always save your ECU’s original configuration before making any changes. If something goes sideways, you’ll be glad you have a safety net. Think of it as your “undo” button in real life.
In short, wiring and configuring a standalone ECU isn’t just about connecting wires and flipping switches. It’s a careful dance between patience, precision, and preparation. Keep your cool, trust the process, and you’ll avoid the common traps that turn a promising project into a frustrating ordeal.
Frequently Asked Questions
- What exactly is a standalone ECU, and why should I consider it for my 2JZ engine?Think of a standalone ECU as the brain upgrade your 2JZ engine craves. Unlike the stock ECU, which is like a one-size-fits-all hat, a standalone ECU lets you tailor every aspect of your engine’s performance. This means better control over fuel, ignition, and boost settings, unlocking your engine’s true potential with custom tuning that adapts to your modifications.
- Can I install a standalone ECU myself, or do I need professional help?While the idea of DIY ECU installation sounds thrilling, wiring and calibrating a standalone ECU on a 2JZ can get complex—like solving a high-stakes puzzle. If you’re comfortable with automotive wiring and tuning software, you might pull it off. But for most, teaming up with a pro tuner ensures you avoid costly mistakes and get the best performance out of your setup.
- What’s the difference between a plug-and-play and a custom wiring harness?A plug-and-play harness is like a ready-made puzzle piece designed to snap right in—quick and neat installation with minimal fuss. On the flip side, a custom wiring harness is crafted specifically for your build, offering flexibility but requiring more time and expertise to wire correctly. Your choice depends on your build’s complexity and how hands-on you want to be.
- Which sensors are essential to integrate with my standalone ECU?To keep your 2JZ engine running smoothly and safely, integrating sensors like the MAP (Manifold Absolute Pressure), IAT (Intake Air Temperature), and a wideband O2 sensor is critical. These sensors feed real-time data to your ECU, helping it make precise adjustments to fuel and timing—think of them as your engine’s vital signs monitor.
- How do I avoid common wiring mistakes during installation?Wiring errors can be a nightmare, leading to no-start conditions or worse. Always double-check your pinouts against the ECU’s wiring diagram, use quality connectors, and keep your wiring tidy to prevent shorts. Labeling wires and testing circuits before finalizing can save you hours of troubleshooting headaches.
- Can I use a digital dash or CAN keypad with my standalone ECU?Absolutely! Adding a digital dashboard or CAN keypad is like giving your ECU a high-tech control panel. It lets you monitor engine parameters in real-time and even tweak settings on the fly, turning your cockpit into a command center that’s both functional and cool.
- What are some tuning tips to maximize my 2JZ’s performance?Focus on dialing in your boost control smoothly, setting accurate air-fuel ratio (AFR) targets, and fine-tuning ignition timing tables. Think of it as orchestrating a symphony—each element must hit the right note to unleash powerful, reliable performance without risking engine damage.
- Will switching to a standalone ECU improve reliability?Yes! A standalone ECU often offers better reliability because it’s designed to handle aftermarket modifications and extreme conditions that stock ECUs struggle with. Plus, with precise tuning, your engine runs cleaner and cooler, reducing stress and extending its lifespan.