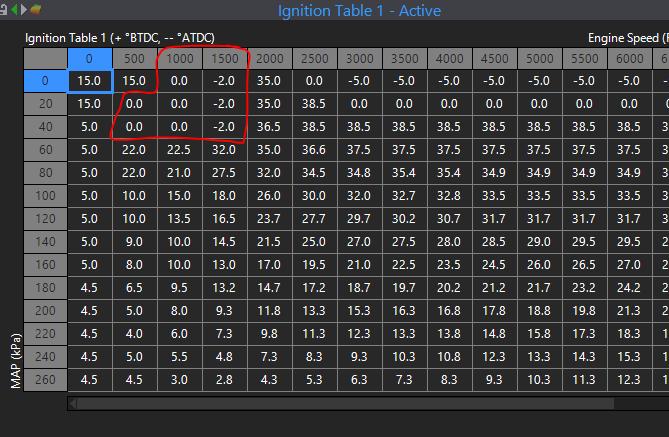
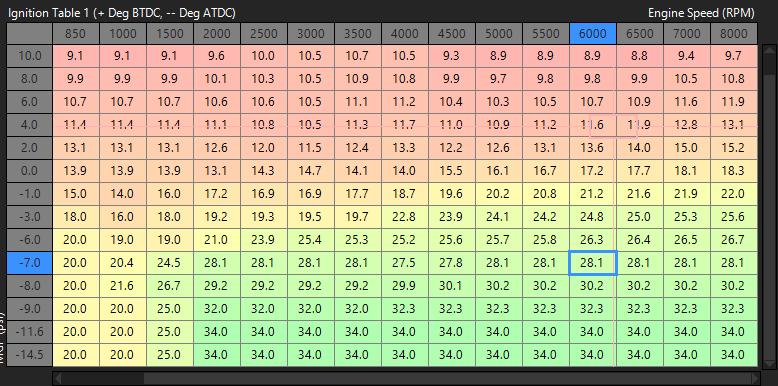
The 2JZ-GTE engine, celebrated for its performance and durability, relies heavily on precise ignition timing to operate optimally. Ignition timing determines when the spark plug fires during the engine’s cycle, impacting power, fuel efficiency, and overall engine health. Properly set ignition timing ensures that your engine runs smoothly, delivers maximum power, and avoids issues such as knocking or poor acceleration.
In this guide, we will delve into the importance of ignition timing, identify symptoms of incorrect timing, and provide detailed, step-by-step procedures for inspecting and adjusting the ignition timing of your 2JZ-GTE engine. By following these steps, you can maintain your engine’s performance and longevity.
Understanding Ignition Timing
Ignition timing refers to the precise moment when the spark plug ignites the air-fuel mixture in the combustion chamber. This event must occur at the right time to ensure efficient combustion and optimal engine performance.
Components Involved:
- Crankshaft Position Sensor: Monitors the position of the crankshaft and provides data to the ECU for timing control.
- Distributor: In older engines, the distributor directs high-voltage electricity to the spark plugs. In modern engines, electronic systems control ignition timing.
- Timing Marks: Indicators on the crankshaft pulley and engine block that help in setting and checking ignition timing.
Optimal Timing: Optimal ignition timing varies by engine design but typically occurs just before the piston reaches the top of its compression stroke (top dead center or TDC). Proper timing ensures maximum power output and fuel efficiency while minimizing emissions.
Symptoms of Incorrect Ignition Timing
Symptoms:
- Poor Acceleration: The engine struggles to accelerate, especially under load.
- Engine Knocking: A pinging or knocking sound during acceleration, indicating pre-ignition or detonation.
- Increased Fuel Consumption: The engine burns more fuel than usual, reducing fuel efficiency.
- Rough Idle: The engine runs roughly or unevenly at idle.
Causes:
- Worn Timing Components: Timing chains or belts that have stretched or worn out.
- Incorrect Adjustments: Previous timing adjustments that were not done correctly.
- Faulty Sensors: Malfunctioning crankshaft position sensors or other related components.
Step-by-Step Ignition Timing Inspection Procedures
Preparation for Testing:
- Tools Needed: Timing light, wrenches, the vehicle’s service manual.
- Safety First: Ensure the vehicle is on a level surface, the parking brake is engaged, and the engine is at operating temperature.
Using a Timing Light:
- Setup: Connect the timing light to the battery and the number one spark plug wire following the manufacturer’s instructions.
- Locate Timing Marks:
- Identify the timing marks on the crankshaft pulley and the timing tab on the engine block.
- Clean the marks if they are dirty or hard to read.
- Measure Timing:
- Start the engine and aim the timing light at the timing marks.
- Observe the timing marks in relation to the timing tab.
- Interpret Results:
- Compare the observed timing with the manufacturer’s specifications.
- If the timing mark is aligned with the specified degree on the timing tab, the timing is correct.
- If the timing mark is advanced or retarded, adjustments are necessary.
Interpreting Timing Marks:
- Advanced Timing: The timing mark appears before the specified degree, indicating the spark occurs too early.
- Retarded Timing: The timing mark appears after the specified degree, indicating the spark occurs too late.
- Correct Timing: The timing mark aligns with the specified degree, indicating the spark occurs at the right time.
Step-by-Step Ignition Timing Adjustment Procedures
Adjusting Timing with a Distributor:
- Locate the Distributor: Find the distributor on the engine.
- Loosen the Hold-Down Bolt:
- Use a wrench to loosen the bolt that secures the distributor in place.
- Adjust Timing:
- Rotate the distributor slightly to advance or retard the timing.
- Turn clockwise to advance the timing and counterclockwise to retard it.
- Recheck Timing:
- Use the timing light to check the timing again after making adjustments.
- Continue making small adjustments and checking until the timing is correct.
- Secure the Distributor:
- Tighten the hold-down bolt once the timing is set correctly.
Adjusting Timing with an ECU:
- Access the ECU: Connect a diagnostic tool or ECU programmer to the vehicle’s OBD port.
- Navigate to Timing Settings:
- Use the tool to navigate to the ignition timing settings in the ECU.
- Adjust Timing:
- Follow the tool’s instructions to adjust the timing.
- Make small adjustments and monitor the engine’s response.
- Verify Adjustments:
- Use the timing light to verify the new settings align with the manufacturer’s specifications.
Preventive Maintenance Tips
Regular Inspections:
- Schedule: Inspect ignition timing as part of regular maintenance, typically every 15,000 to 30,000 miles or as recommended in the service manual.
- Visual Checks: Regularly inspect timing components for signs of wear or damage.
Cleaning Components:
- Throttle Body: Keep the throttle body clean to prevent issues that can affect timing.
- Idle Air Control Valve: Ensure the IAC valve is clean and functioning properly.
Using Quality Parts:
- Replacement Parts: Use high-quality timing belts, chains, and sensors to ensure reliable performance.
Keeping Records:
- Maintenance Log: Keep a log of all timing inspections and adjustments, noting the date, mileage, and any parts replaced.
Conclusion
Proper ignition timing is essential for the performance and longevity of the 2JZ-GTE engine. Regular checks and adjustments ensure smooth engine operation, improved fuel efficiency, and reduced wear on engine components.
Implement a routine ignition timing check and adjustment schedule to keep your engine running optimally. If you encounter any issues or need assistance, seek professional help to ensure your ignition timing is correctly maintained.
Frequently Asked Questions (FAQ)
Why is ignition timing important?
Ignition timing ensures that the spark plug fires at the optimal moment for efficient combustion, which is crucial for engine performance and fuel efficiency.
How often should I check my ignition timing?
Check your ignition timing every 15,000 to 30,000 miles or as recommended in the vehicle’s service manual.
What tools do I need for checking and adjusting ignition timing?
You will need a timing light, wrenches, and possibly a diagnostic tool for ECU adjustments.
Can I adjust ignition timing myself, or should I go to a professional?
You can adjust ignition timing yourself with the right tools and knowledge. However, if you are unsure or encounter issues, it is best to seek professional help.
What are the signs that my ignition timing needs adjustment?
Signs include poor acceleration, engine knocking, increased fuel consumption, and rough idle.

